Last Updated on 30 September 2023 by Cycloscope
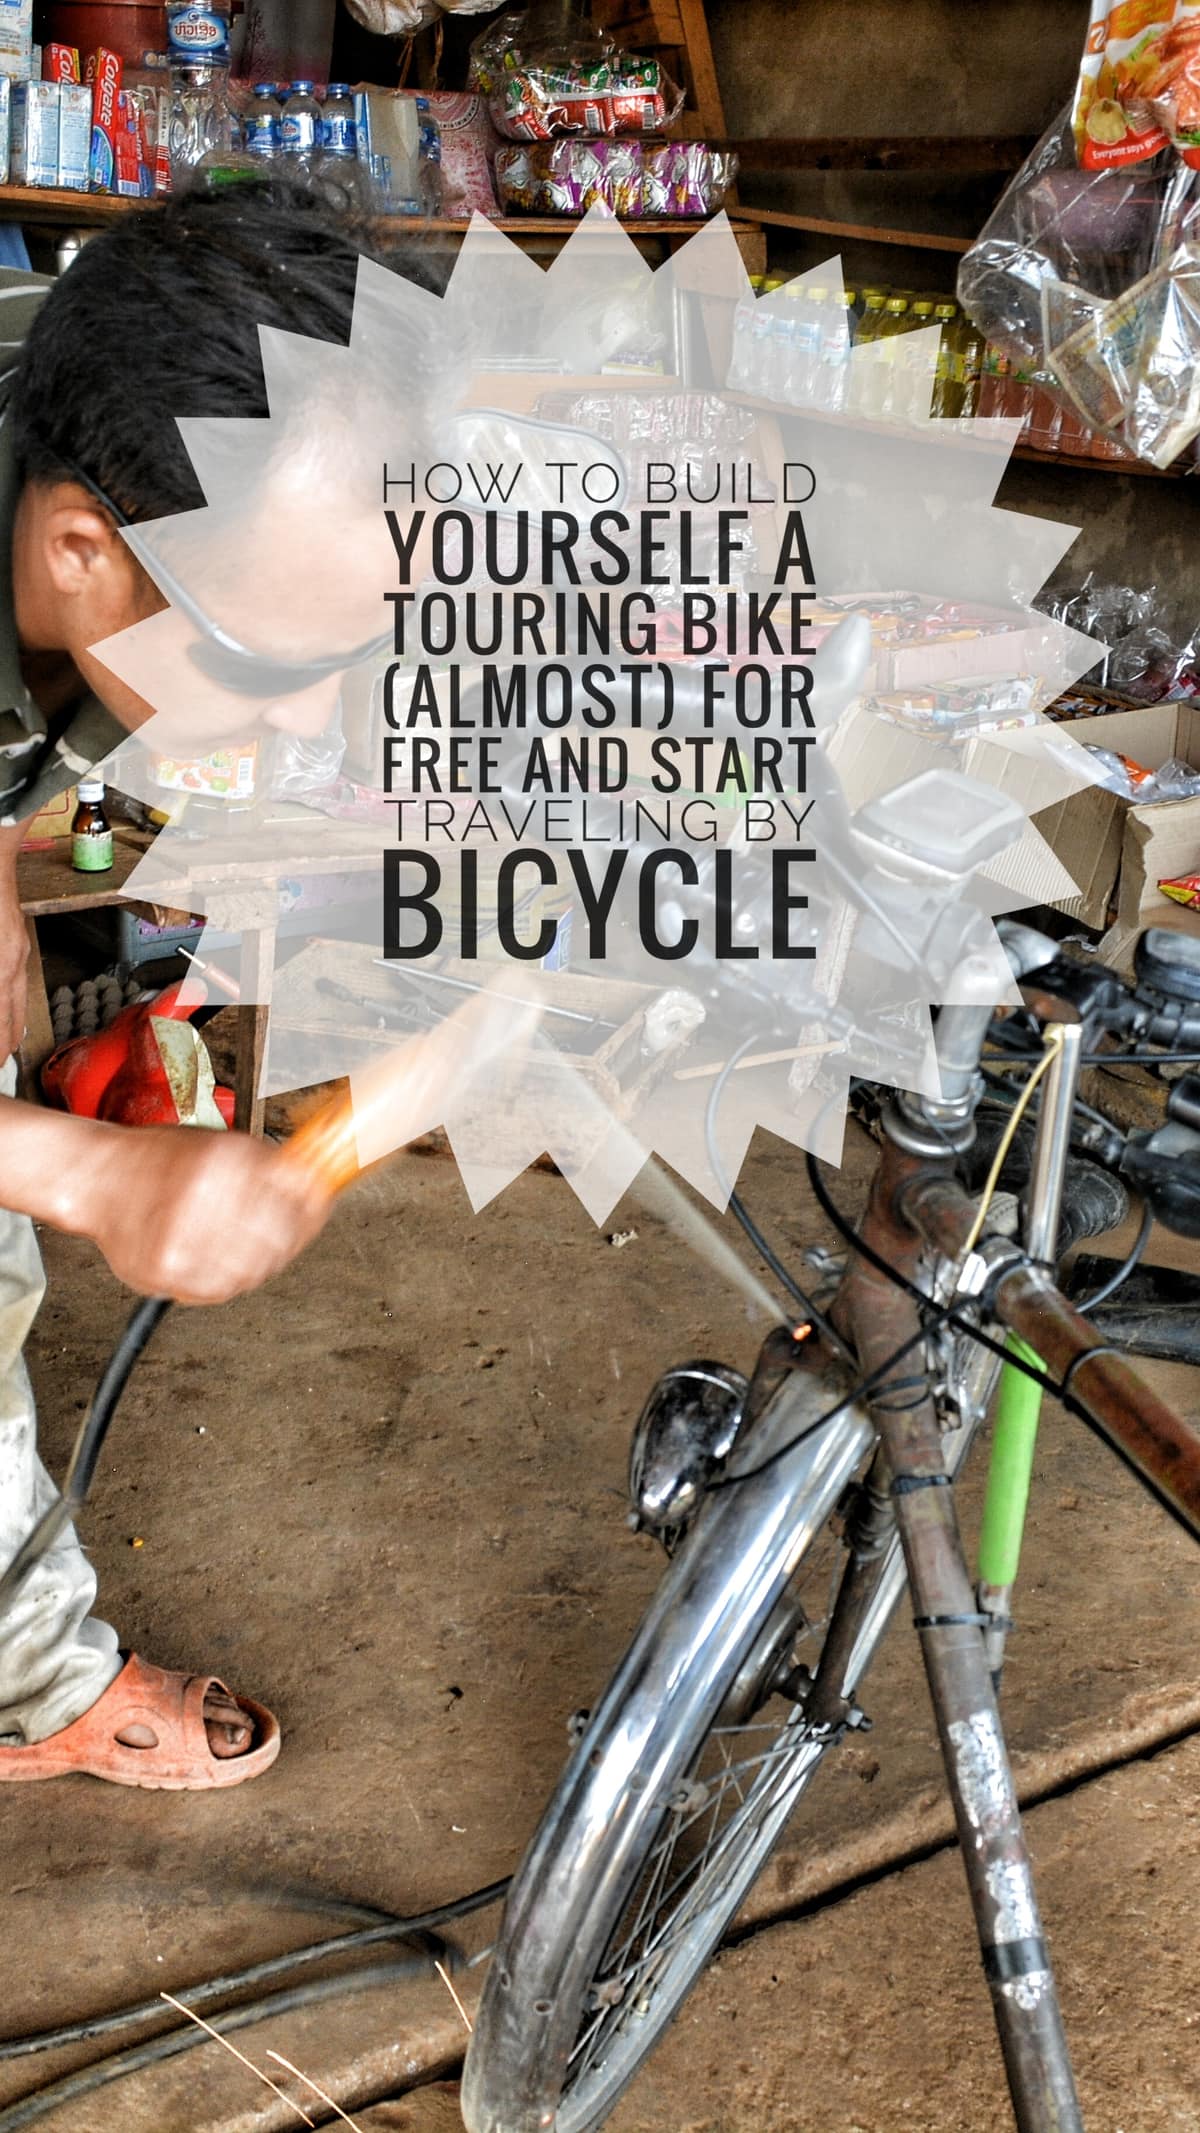
How to find a Free Bicycle and Build it into a Touring Machine for Less than 100$
This article is part of our series
Disclosure: Some of our articles contain affiliate links. This comes at no additional cost for you and helps us keep this website up and running. (as Amazon Associates we earn commission from qualifying purchases)
How we compile our gear guides: during the almost 10 years of cycloscope.net our team personally tested dozens of similar pieces of gear. For what we can't test personally, we involve other people in the cycling community to give their feedback and opinion about gear they have used. Our decade-long experience in bicycle touring enables us to find the key cons and pros of every product we mention.
Getting Started with Bicycle Touring
Check also
The essential bicycle touring or bikepacking gear
30 Rules (or advice) fo follow when traveling by bicycle
How to build yourself a free or very cheap touring bike
Getting to know the “bicycle touring enthusiasts” online community, I’ve got the feeling that too many people assume you’ll need an expensive bike to get on a bicycle tour or bikepacking trip.
Let me say that straight, that’s not true, you can build yourself a cheap touring bicycle from scrap, and we’ll show you how.
Although there is no doubt that, as a rule of thumb, you get what you pay for, I like to say that every bike is a touring bike, as long as you tour with it. In this article, I’ll try to give some advice on how to turn a free or cheap piece of junk into your next touring bicycle.
My first 25,000km were done on a 1936 Royal Nord, a museum piece of a bicycle. Antique more than vintage. The President (that’s the name of the bicycle) wasn’t specifically designed for loaded touring, but it ended up handling it amazingly.
Let’s also face another truth, the great majority of people won’t embark on multiple years journey, mainly weekend tours, everyday commuting, and once-a-year longer trips.
If instead, you have a budget to invest, you can check our lists of
18 Great Touring Bikes Under 2,000$,
21 Best Touring Bicycles Under 1,000$,
10 Great Woman Specific Touring Bikes.
Curious about
What’s the Best Type of Bike For Touring and Adventure Cycling? 7 Best Bikes for Cycle Travel
Let’s get started
Where to get a Bicycle for Free
Ok, let’s assume you don’t have a bike nor a budget, but you really want to start bicycle touring. Where do you start looking?
- Your, or your family members’ garage: are you really sure you don’t have a bicycle? Maybe your parents kept that mountain bike they bought you when you were a teenager, or maybe your uncle once bought a steel race bike he never used. What about your grandparents? You could find some vintage jewel in their canteen.
- Ask your friends, even on Facebook: are you sure none of your friends has a bike he/she wants to get rid of? Explain to them your crazy ideas, they might want to support you by giving you that dusty bike they almost forgot they had, or maybe you can barter that for a dinner, few beers, or that old guitar you don’t play anymore.
- Scrapyard: see if you can visit your local scrapyard or junk deposit, people often throw away stuff that is almost new!
Where to get a Bicycle for Cheap
- Second-hand stores and thrift shops: those are everywhere and always have a few bikes, check often because nice bikes are quick to go. You can also ask the clerks to contact you when they get some new items, again explain to them what you want to do, maybe you’ll get their sympathy.
- Benefit Auctions: ask around if there is some going on, network with your community.
- Social workshops: I don’t know if they exist in your city, but in Italy, those are pretty common. They are usually organized by squatted places or social centers. We are talking about bicycle workshops where everybody can go and fix his own bike, using shared tools. There are always experienced people to learn from and usually bikes and parts that people donate. This is another great way to network with like-minded people.
- Internet: when we talk about second-hand bikes it’s always better to have a look in person than to blindly buy online. That doesn’t mean you can’t find good deals. There are often local websites to check or Facebook buy/sell groups. Resort to eBay as your last chance.
Read also
> Everything about Touring on a MTB
> Touring on a Gravel Bike: pros/cons and 6 cheap gravels for touring
> 15+1 Best Bikepacking Bikes in 2023: Gravel, Touring, Plus, MTB Hardtail, Fat, Full-Suspension & Folding
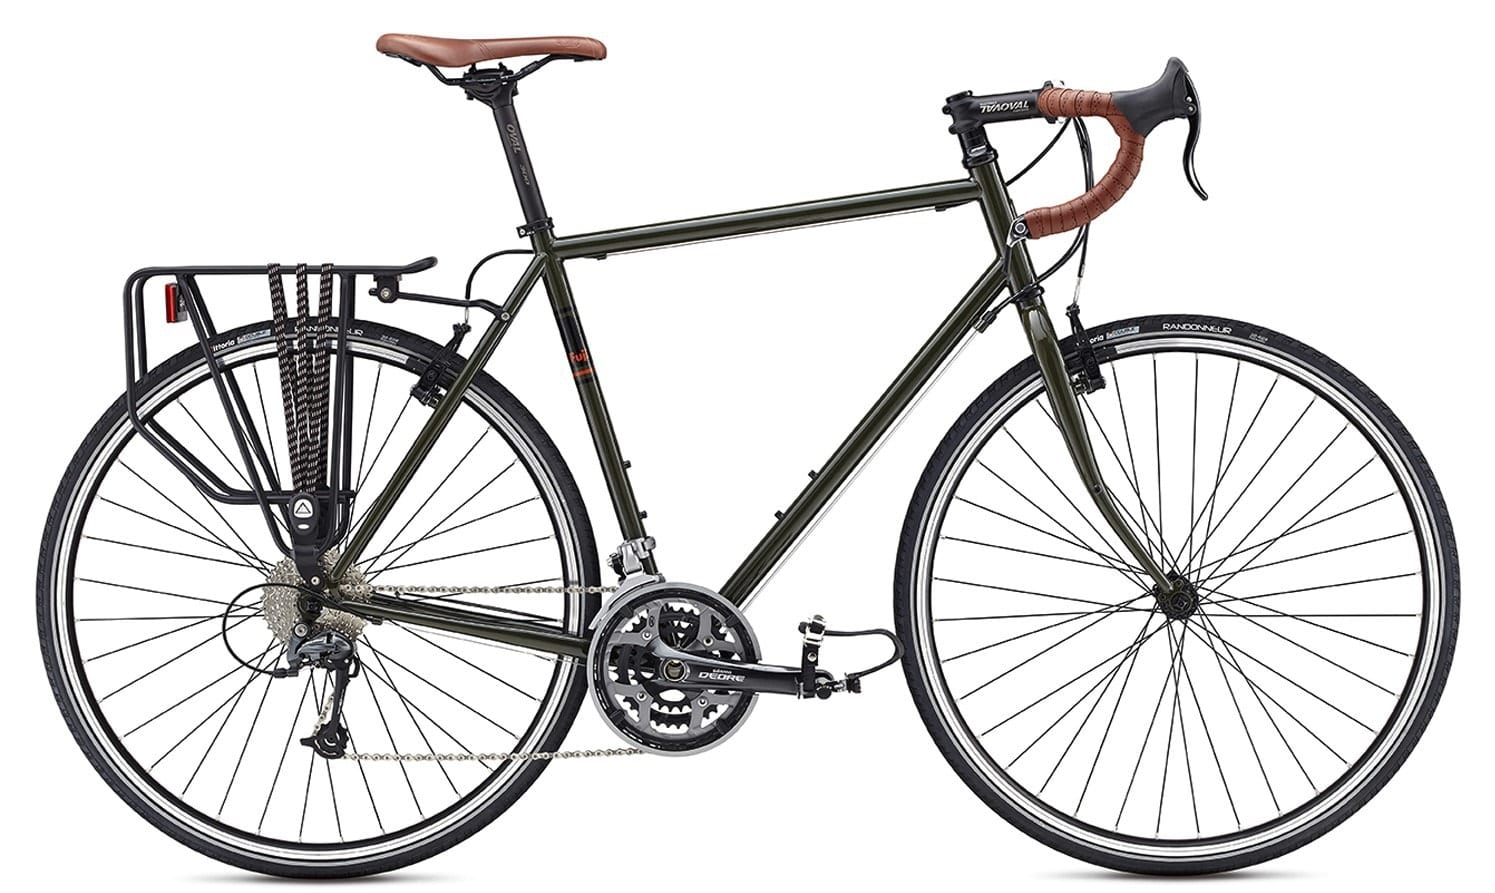
What makes a bike a become touring bike
When you go looking for a bike to transform into your next touring companion there are a few things to pay attention to, the most important are the frame and the wheels, that hold all the weight of the rider and the gear. Especially important if you’re and heavy rider.
The Frame: How to recognize a frame suited for bicycle touring
The most important component on a touring bike is no doubt the frame. First of all, be sure the frame is not bent and presents no major rust corrosion. Then take a look at the geometry, the shape of the frame.
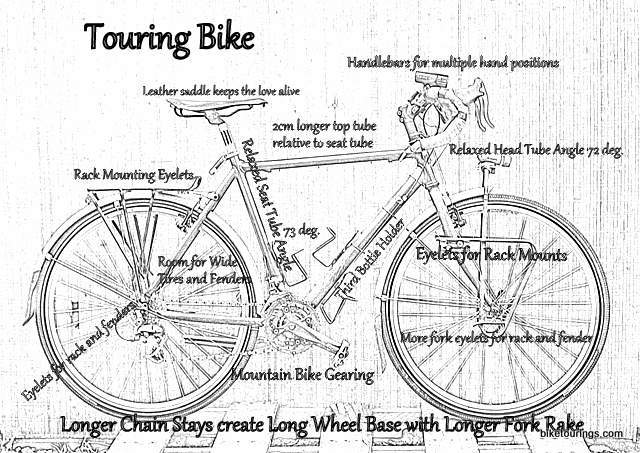
The characteristics of a touring frame are:
- Long wheel-base, or at least long chain-stay geometry: the longer the frame, the more stable is the bike, longer frames absorb vibration better thus making for a more comfortable ride. A long wheel-base helps you avoid the annoying heel-to-pannier contact without shifting the panniers back too much and so losing the center of stability (the weight should be centered with the back axle).
A sign of a long chain-stay is the length of the rear fork, while the wheelbase is made longer also by the bent angle of the front fork, called the rake. A longer rake means a more accentuated bent, this is sometimes referred to as a lazy fork. A lazy fork also offers some cushioning for the vibrations while making the bike a little less agile (steering is slower). A long chainstay may also help in fitting larger tires - Strong and stiff frame: this may be hard to get at a first sight. How do you know if a frame is strong or not?
First of all the material: titanium is stronger than steel, that is stronger than aluminum, that is stronger than carbon (at least that’s usually true). Since it is not likely you’ll find any titanium frame in the garbage, go for the steel.
The second hint, check the weldings: clean and nice welding is more likely to be stronger than an ugly one. Check this article to understand more about welding and brazing.
Third, again geometry: a diamond frame is usually stronger than a step-through frame, while a mixte frame may be as strong as a diamond one. Confused, check here to understand more about frame types.
A weak frame may be too flexible, and start wiggling when loaded, especially on downhills, this is dangerous so, before you go, test it with the load on. If you feel that wiggle, opt for a trailer or pack less stuff. - Rack and bottle cage mounting points: unless you opt for the trailer solution or the bikepacking setup, your bike should be equipped with mounting points for front and back racks.
Well, you can also just go with the back rack if you pack light. About the bottle cage, you can always strap one up with zip ties if the frame doesn’t have the holes, I did this on my 1936 bike, and traveled 25,000km with it. Having more than a bottle mount is nice but not as important as other states.
Wheels: the second most important component of a touring bike
After you found the frame you like, it is time to think about the wheels. Wheels are the second most important part of a touring bike, they hold all the weight and are always under stress.
Unless you don’t want to start turning the wheels every day and find yourself with plenty of broken spokes, try to find the best wheels you can.
When I replaced my back wheel in South Korea I bought a 30$ mountain bike wheel and it did just fine for 15,000km more, and still is working. Don’t invest a fortune on wheels but, please (for your own sake), don’t set off with a pair of 5$ wheels, you’ll regret.
Double-check the size of the wheel you’re purchasing is right for your frame.
There’s plenty of debate whether a touring bike must be 26″, 28″ or whatever, don’t overthink that, they are all fine… well, I had some troubles with the 26 1 3/8 size of my old bike, it’s an old standard still used only on cheap bikes, so it was hard to find good tires.
Drive Train for bicycle touring
The more gears you have, the better you’ll challenge every hill. Try to have a triple crankset in the front and at least a 7-speed cassette in the back. Don’t spend too much money on these, if your budget is tight invest more in the wheels.
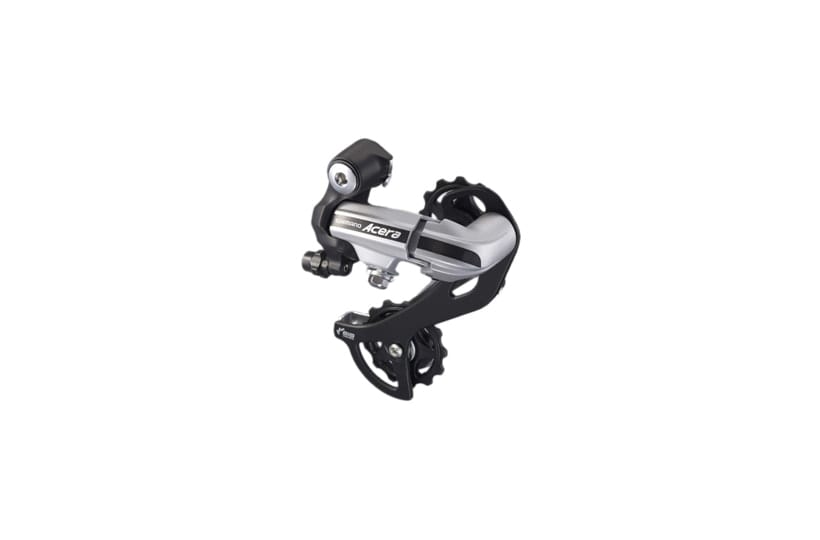
Hi-end front and rear derailleurs are not needed in the world of loaded bicycle touring. You’ll be fine even with the cheapest Shimano SIS or Tourney, but consider putting 10$ in a Shimano Acera or Sora back derailleurs.
The front derailleur matters less, that’s why a mix of different Shimano (or SRAM, or Campagnolo) series it’s often found also on commercial bikes.
I advise to choose Shimano for one simple reason, you’ll find replacement everywhere, literally. Here’s the Shimano Parts hierarchy if you’re curious.
Cranks are really not so important, the main difference between expensive cranks and cheap ones is the weight, we’re talking about few grams, that really won’t make any difference when for loaded bike touring. Same goes for the cassette. Choose the wider range of gears you can figure out, that’s it.
Chain: cheap chains wore out faster, but it’s the most common item and you’ll find a replacement everywhere.
Shifters: go for the cheap ones, but bear one thing in mind, don’t combine different brands of shifters and derailleurs because they don’t work together!
I went crazy for three days trying to regulate the shifting of Shimano shifters with a SRAM back derailleur before I found out that, don’t do my same mistake!
Brakes
Well, those are important too, lifesaving sometimes. But what’s most important when talking about brakes is maintenance. Be sure they are always well regulated and check if the pads need replacement.

Disk brakes have the strongest breaking force, but cantilever and V-brakes are also pretty good, I myself toured with long calipers, I was never very happy with them but they worked fine enough for two years. I had no choice with my frame so I went for it.
Headset and Handlebars
Unless they are rusty or bent, you can go with what you have. Open and lubricate the headset bearings before going and that’s it, if you don’t know how, go to a bike mechanic and have him/her do that, watch and learn.
If you want to change the style of the handlebars (from drop bars to flat or butterfly or any other way around), be sure the frame can accommodate that. Flat bars and butterfly are always (I think), interchangeable but not so goes with drop bars, ask a mechanic.
People often wonder which style of handlebars is better for bike touring, there’s no answer to that, just try what you’re comfortable with.
Saddle and Seatpost
The saddle is where you’ll sit most of the day, but unless you have the money for that, you don’t really need a Brooks. Elena went on 25,000km with a cheap saddle like this one, and it was fine.
The intimacy between you and your saddle will take a while to work, but after that (months of riding) you’ll be perfect companions. Remember that man’s saddle are different from woman’s. The seat post is really not that important, go with what you have (always check for major rust).
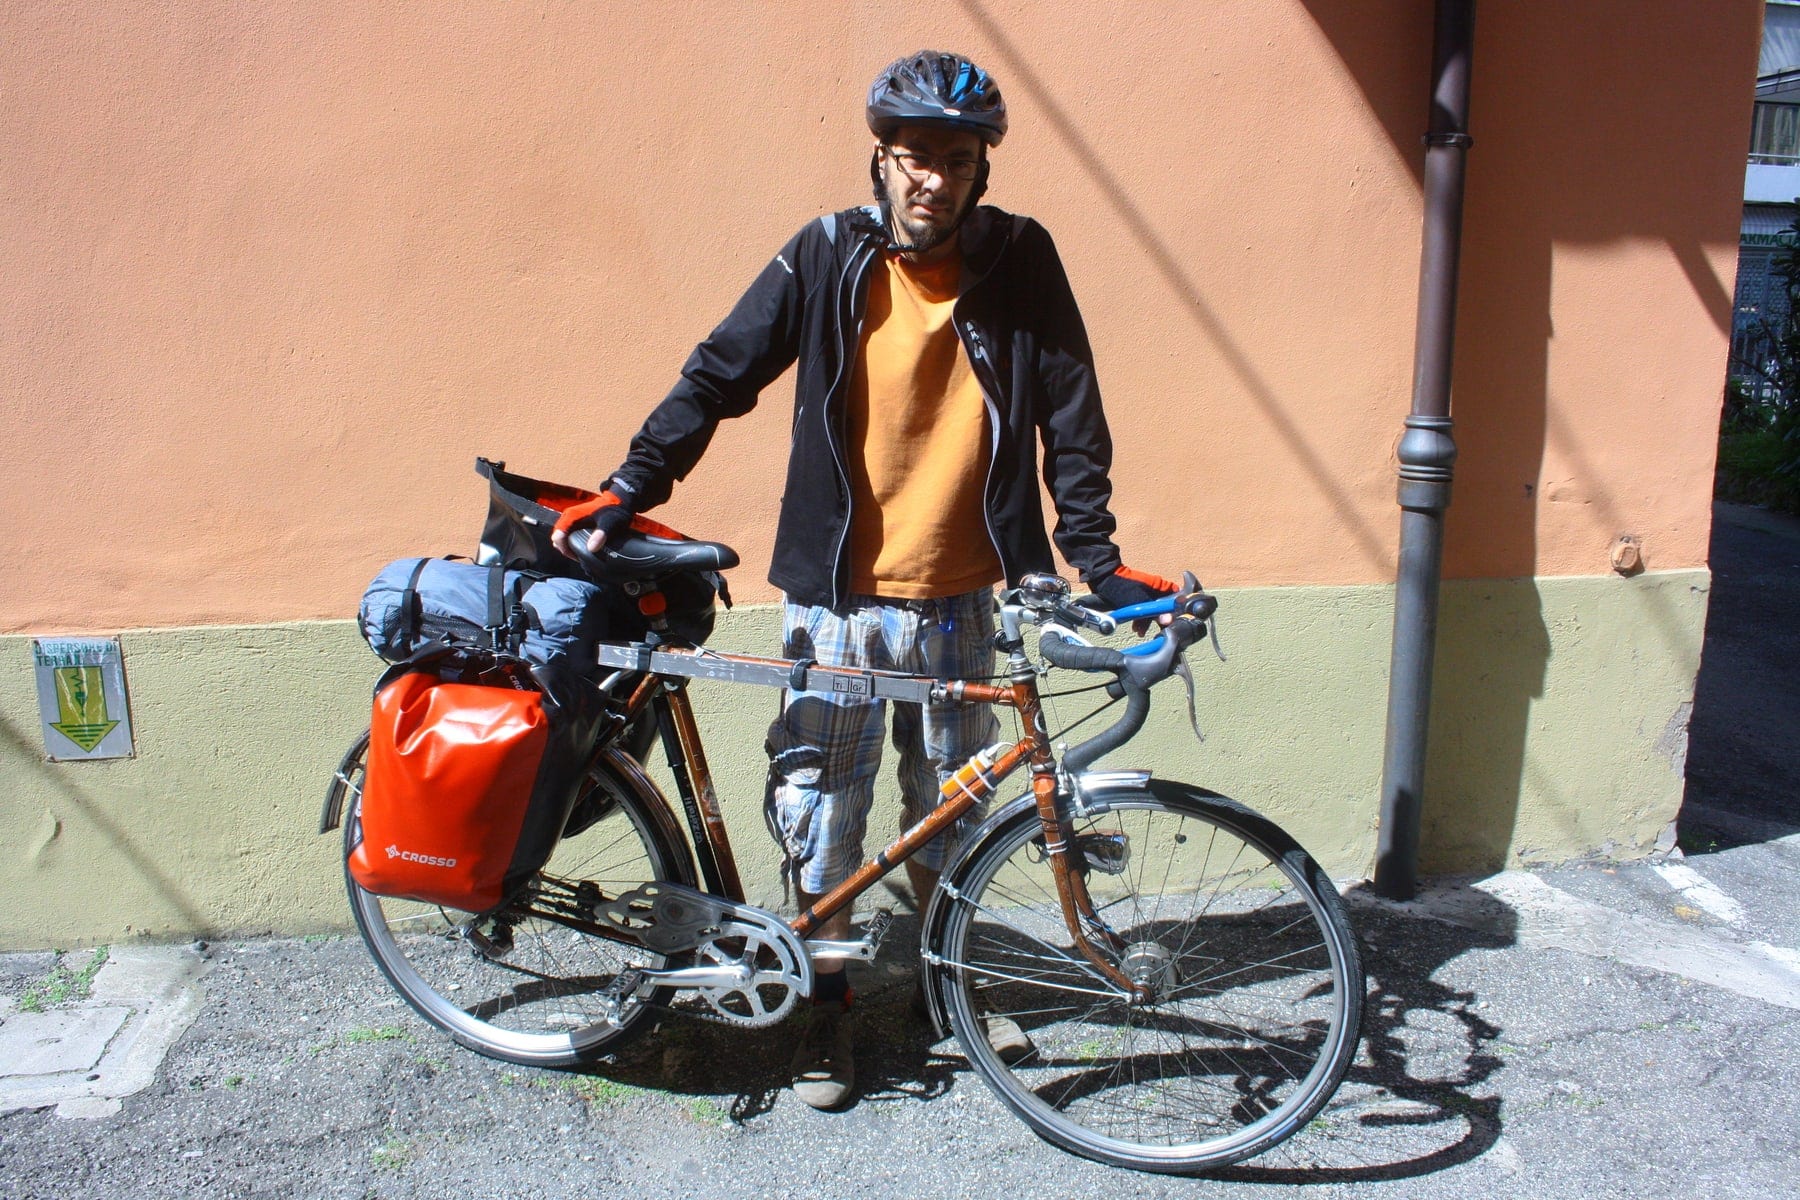
Racks for Bicycle Touring: another important component
Racks suffer heavy solicitations under load, so they are prone to failure. Especially if you plan to cycle some dirt roads, consider investing a few bucks in that, we know people who didn’t and regretted it. We use Crosso, they are cheap enough (about 30$) and we never had any trouble. Check also our post about the best cycle touring racks.
Tires for Bicycle Touring
The best tires for bicycle touring are probably the Schwalbe Marathon Plus, those are not cheap though, coming at about 30 bucks each.
You can go with cheap tires like this too, as long as you bring your toolkit essentials and learn how to repair a puncture. Just be sure to don’t put yourself in danger by riding on worn-out tires.
Assemble your touring bike and go
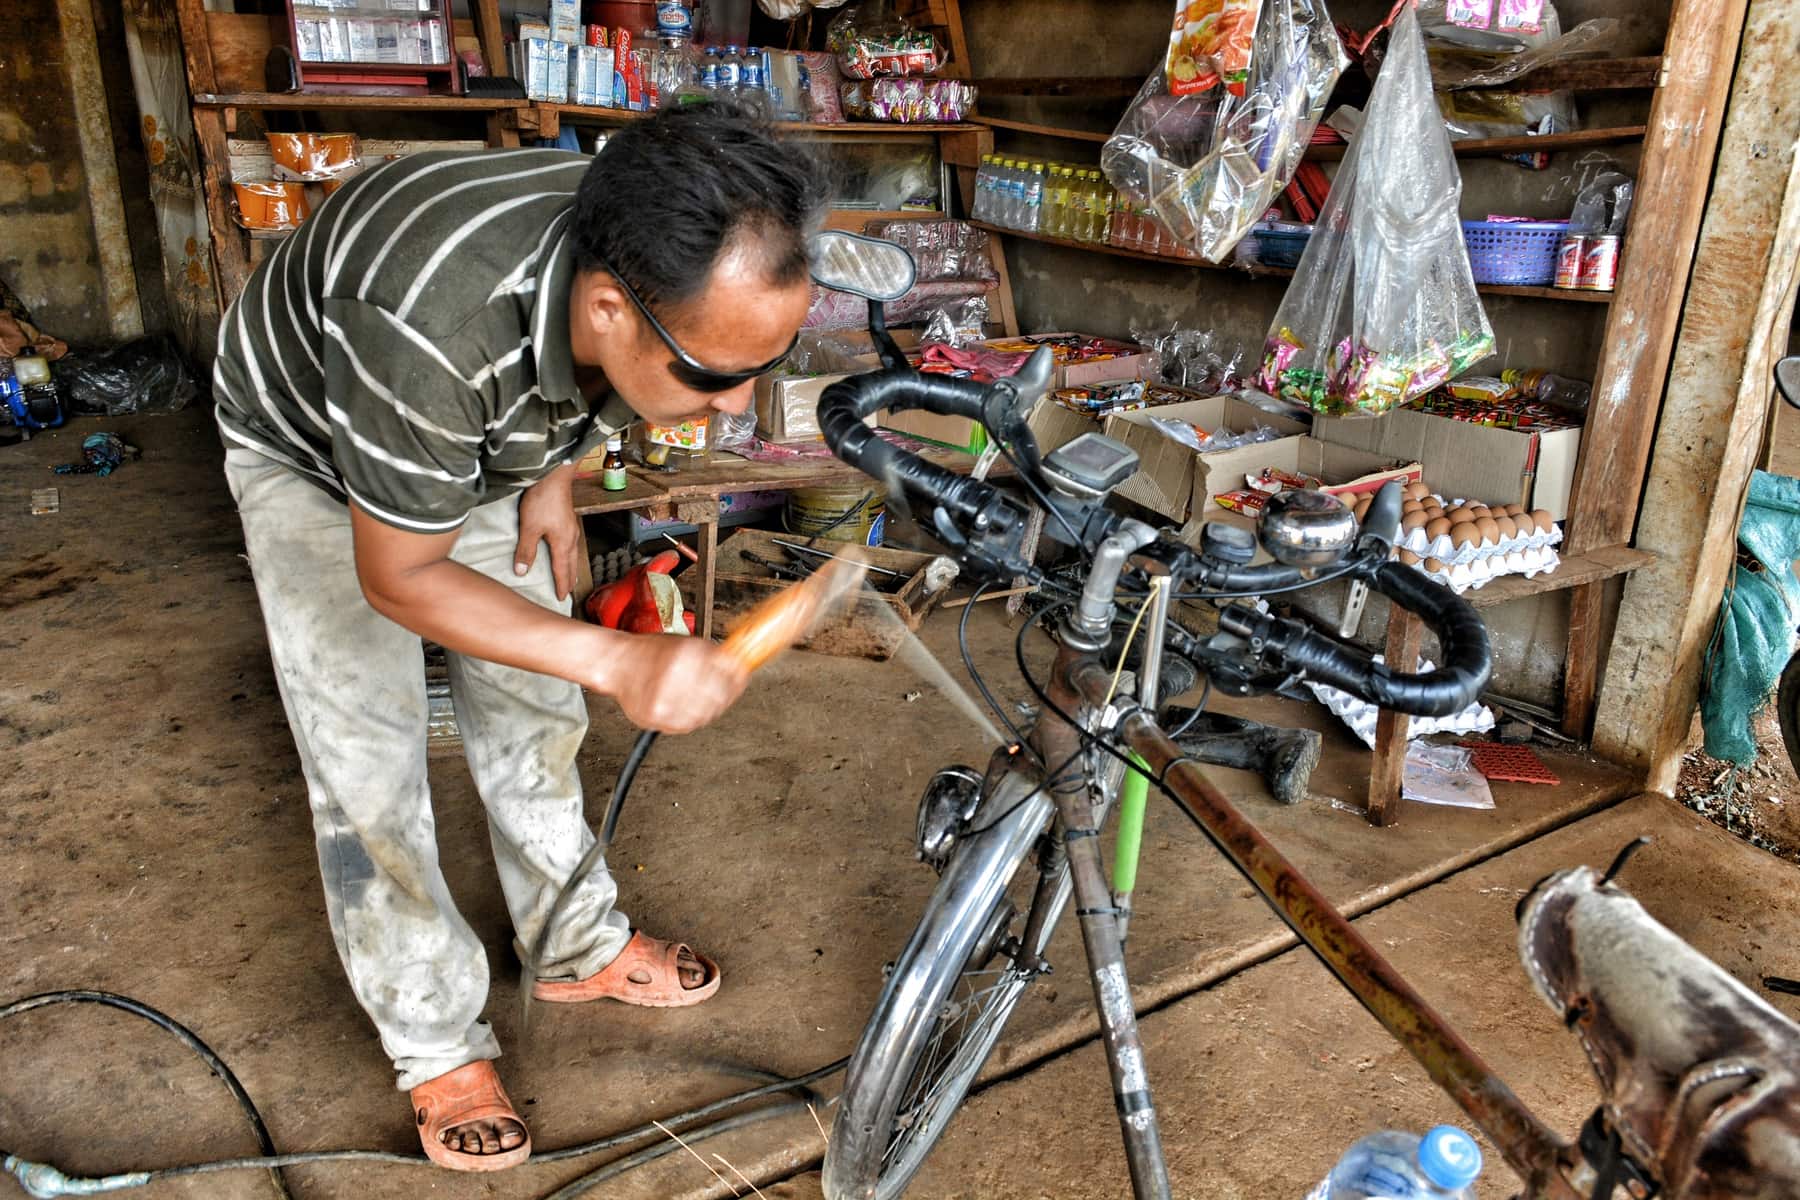
Now that you have all the components, is time to put the bike together. If you have no experience, don’t worry, you can always watch a ton of YouTube videos and learn. By doing things yourself you’ll gain a lot of skills that will be extremely helpful during your trip.
If there’s a local social workshop, go for it or you can always try to befriend a mechanic, buy him/her a couple of beers and watch him/her work. Be sure though to let a professional give the last look to your bike before you set off.
Now that you’re all set with your (almost) new touring bike it’s time to gear up, pick a destination (or just a direction) and set of for you great trip!
Check the directory article:
> Bicycle Touring 101Take also a look at the semi-serious
> 30 Rules (or advice) to follow when traveling by bicycle
FAQs about building your own touring bike
Can you turn any bike into a touring bike?
While you can modify many types of bikes to handle some light touring, not every bike is suitable for long-distance touring. Touring bikes are specifically designed to carry heavy loads and provide comfort for extended rides. They typically have features such as:
Sturdy Frame: Touring bikes have robust frames with mounting points for racks and panniers to carry gear.
Long Wheelbase: A longer wheelbase provides stability and better handling when carrying loads.
Wide Tire Clearance: Touring bikes often have clearance for wider tires, providing more comfort and stability on rough roads.
Comfortable Geometry: Touring bikes have a more relaxed and comfortable riding position to reduce strain on the body during long rides.
Durable Components: They are equipped with durable and reliable components to withstand the demands of touring.
While you may be able to add racks and panniers to certain bikes, if your bike lacks essential features like mounting points or tire clearance, it may not be the best option for extended touring. Hybrid bikes, touring-specific bikes, adventure bikes, and some steel road bikes are more suitable for bike touring.
Bikepacking however, doesn’t require mounting points, so it’s easier to adapt a road bike or a MTB for the purpose.
Is it cheaper to build a bike from scratch?
Building a bike from scratch can be cheaper or more expensive depending on a few things. If you go for fancy, high-end parts, it might cost more. But if you choose budget-friendly components especially second-hand ones, maybe even sourced from the scrapyard, it could save you money – but you need to be able to recognize if a component is viable or not.
Sometimes, buying a complete bike with special deals or discounts can be cheaper.
Building a bike though is not such a soft piece of cake, it requires special tools and know-how.
If you’re not confident in your mechanical skills, you might end up paying a bike shop to do it for you, adding to the cost – or worse, putting yourself in danger. Building from scratch lets you make it exactly how you want, but it takes time and effort. If you prefer convenience, buying a ready-made bike might be easier.
How to turn a mountain bike into a touring bike?
Converting a mountain bike into a touring bike can be a fun project that allows you to customize your ride for long-distance adventures. Here’s a step-by-step guide to help you get started:
Assess Your Mountain Bike: Check if your mountain bike is suitable for touring. Look for mounting points on the frame for racks and fenders. Ensure that your bike’s geometry provides a comfortable and stable riding position for long hours on the road.
Replace Tires: Swap out knobby mountain bike tires for smoother, wider tires with puncture protection. Look for touring or adventure bike tires that provide better comfort and efficiency on paved and gravel roads.
Add Racks and Panniers: Install a rear rack and front rack on your mountain bike, allowing you to carry gear and supplies. Ensure the racks are compatible with your bike’s frame and provide a secure attachment.
Consider a Front Suspension Fork: If your mountain bike has a front suspension fork, consider replacing it with a rigid fork. Rigid forks are more efficient for touring and provide better stability when carrying loads on the front rack.
Upgrade Gearing: Touring often involves climbing hills and carrying extra weight. Consider changing the gearing on your mountain bike to include lower gears for easier pedaling on long, challenging climbs.
Install Fenders: Fenders are essential for keeping you and your gear clean and dry during wet weather. Look for fenders that fit your tire size and have proper coverage.
Add Lights: Install front and rear lights on your bike to enhance visibility, especially if you plan on riding in low-light conditions or at night.
Install a Comfortable Saddle: Replace your mountain bike’s saddle with a more comfortable touring saddle that suits your riding style and provides support for long hours in the saddle.
Fit a Handlebar Bag: Consider adding a handlebar bag for easy access to essentials like snacks, a map, or a camera.
Tune-up and Maintenance: Before embarking on your touring adventure, give your bike a thorough tune-up. Check the brakes, drivetrain, and all components to ensure they are in good working condition.
Pack Smart: When packing for your tour, be mindful of the weight distribution on the racks. Keep heavier items low and centered for better balance and stability.
Needless to say, while converting a mountain bike into a touring bike can be a rewarding experience, it may have limitations compared to purpose-built touring bikes.