Last Updated on 30 September 2023 by Cycloscope
Going tubeless for cyclocross and gravel bikes has been taking up the stride! But how to install tubeless tires? Here’s the entire step-by-step process for you.
In the past few years going tubeless for cyclocross has been taking up the stride and deservingly so.
Disclosure: Some of our articles contain affiliate links. This comes at no additional cost for you and helps us keep this website up and running. (as Amazon Associates we earn commission from qualifying purchases)

The attraction among many mountain cyclists is the lack of getting pinch flats or any flats from sharp objects or thorns as there’s no additional internal tube that is installed in traditional tubular tires. Instead, we shift to an upgrade that is well worth the time and money.
Most cyclocross being manufactured today does ensure compatibility to going tubeless, and maybe that’s one of the best things you can do to your cyclocross.
In this article, we are going to go into the details on how to install tubeless cyclocross tires and ride your bike with a whole new experience.
Check Also: The Best Gravel Bikes for less than 1000/1500$
Tubeless Tire Compatibility
As we mentioned previously, the first thing that needs to be assessed is your cyclocross’s compatibility with a tubeless tire. A standard set of wheels or a standard cyclocross can be fitted with a tubeless tire.
However, it does require a little bit of maneuvering and a lot of hacks to actually work. Even then it may not be so. The reason is quite simple.
A tubeless tire has a thicker bead that is relatively less elastic or prone to stretching than it’s standard counterparts.
The rim is also thicker does result in a perfect fit which may not be the case if your cyclocross is not tubeless compatible.
Upgrade: The best Gravel Wheelsets for Bikepacking
Tool Needed
1. Tubeless Tape
2. Tubeless Valve
3. Sealant
4. Sealant Injector
5. Track/Floor Pump
6. Tubeless Kit
How To Install Tubeless Cyclocross Tires
Here’s the entire step-by-step process for you.
Step 1: Clean up the rim of the wheel with any cleaner or disinfectant
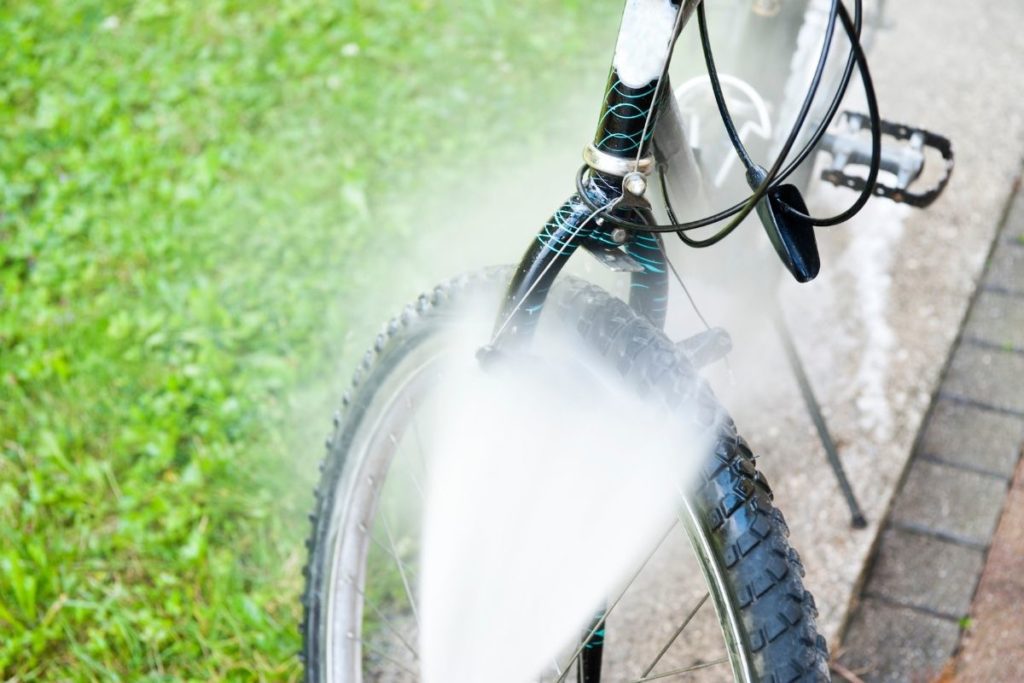
This is necessary to remove any dirt, dust, grease, or contaminants and ensure a clean, smooth surface to work with.
Ignoring this step could be critical to the process as this could result in further complications later on when we use the sealants on the tire.
Pro tip: At this stage, also warm up your tires to make them more pliable by soaking them under the sunlight or keeping them next to a fire if it’s winter.
Cold tires are harder to work with and the heat stretches the rubber molecules making it much more flexible.
Step 2: Use the tubeless tape and cover up the entire rim
Cover the whole rim starting from about an inch or two from the valve stem role.
It would be a great starting point as later on, we will insert the tubeless valve through the stem hole.
Keep the tape taut and press on the center while covering the rim around the tube to make sure that everything is sealed well enough. Two or three rounds of the tape securely covering the rim should be enough for this step.
Check the Best Tubeless Tape on Backcountry
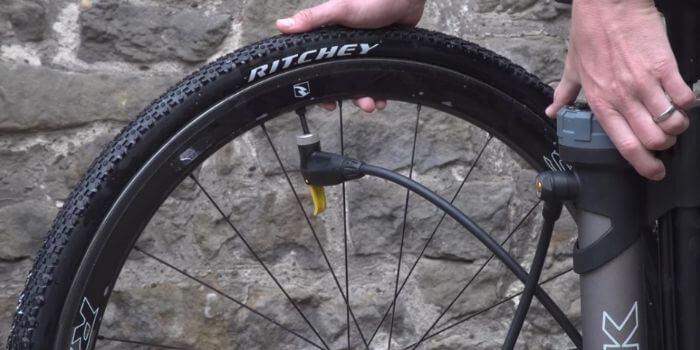
Step 3: Penetrate the tape and stem hole
With a sharp-pointed object, you will have to pierce through the tape and through the stem hole we mentioned before.
At this point, bring out your tubeless valves and insert them through the stem holes firmly enough that the rubber sits securely on the surface of the rim.
Secure the valve but keep it a bit loose with the rotation arrow at the right decision. For better angling and precision, host the cycle onto a higher ground or move into the eye level by crouching down. The tire bead that comes with the valve should remain loose in the end.
Pro tip: If you can find a removable valve core valve, in this process. We highly recommend that as it makes the process of sealing much easier.
Check the Best Tubeless Valves on Backcountry
Step 4: Push your tire into the well of the rim
Moving onto the next step, keeping the sealer valve centrally aligned with the valve sitting on the bottom side, push down the tire into the rim.
The most helpful trick here is actually setting the wheel and the tire on the ground and use the force of your hand and thumbs to pop the tires back inside the rim and press down any stubborn edges.
Make sure you equally insert the tire evenly at all sides till you have a small 4-5 inch pocket for pouring in the sealant later on.
If you still have difficulty achieving it, you may want to consider a tire leveler but we would like to think it usually wouldn’t come to that if you have followed all the steps properly till this one.
If your cyclocross is relatively new, another way of determining success would be to make sure the logo of the cycle aligns up with the leveler.
Pro tip: If your tire is being too difficult and doesn’t want to set in, there are actually lubricants available by different manufacturers that make the process easier.
However, the best option would be a DIY lubricant with soap water as it is readily available and cost-free.
Step 5: Now moving onto sealing the tire to the wheel.
Pour about 50-60 ml of a sealant of your choice into the pocket of the tire and wheel that you just left in the previous step. However, if you have a removable valve, then you can just pour through that.

After that, carefully rotate the wheel around to the part of the wheel that is already sealed. Clean up any excess sealant, sound the tire, and let it sit for a while, still, you can see the tire is securely attached all around the wheel.
Pro tip: Use a quality sealant if you want your tire to hold on. A lot of the time, you will need regular resealing after 4-5 months of use.
If your sealant is not of good enough quality, it would cause the tire to fall apart pretty quickly.
Check the Best Sealant on Backcountry
Step 6: Secure the bead of the valve
After you have cleaned up, push down the tire onto the rim and secure the bead of the valve closely and firmly to the wheel.
Make sure the bead is as closely secured to the rim as possible as otherwise, the tire would not inflate. Using the track/ floor pump at about 160 PSI.
You could also use a normal inflator but that would require vigorous pumping, a strenuous work for any tubeless setup.
Thus, as an investment on the track pump would be worth the buck if you are switching to tubeless cyclocross.
Step 7: Check for leakage
After being inflated the tire would snap into shape. When that happens just check for any leakage and the firmness of the inflation.
Rotate the wheel sideways and also onto the road multiple times to check the durability of the inflation and whether it is sealed properly. After that, let it settle for a while.
Step 8: Repeat the steps
Repeat all from step 1 to step 9 for the second wheel and fix both of the wheels on the bike. Voila, you now have a tubeless cyclocross.
Advantages of Tubeless in Cyclocross and Gravel
Apart from being a favorite among many owners of cyclocross, specifically mountain bikers, there are many more advantages just beneath the hood such as lower pressure for better traction as well as lack of pinch flats and flattened tires.
It also decreases the weight of the bike over 100 grams from its tubed counterpart. The liquid sealant also ensures a layer of protection from punctured holes into the tire.
Most importantly all of these benefits also come at a cheaper price tag as the tubeless cyclocross is cheaper than it’s tubular setup.
Conclusion
We hope this was enough to help you install your cyclocross with tubeless tires and this could help shed the light on why it is also way better.
Have a look at
> The 9 best bike work stand for repair and maintenance
> Bike storage ideas
> 41 Gifts for a Cyclist: ROAD, MTB, BIKEPACKING, COMMUTING